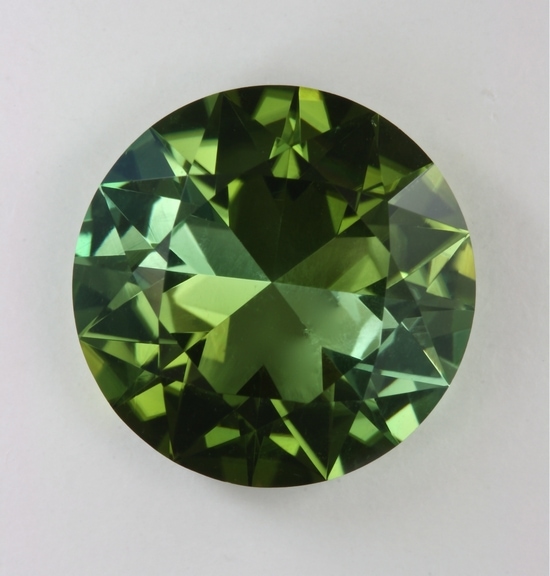
Size does matter when it comes to cutting and polishing on my small, light weight faceting machine that uses 6 inch laps. This post is about a round that is in the easiest range of sizes, from about 5 mm to 10 mm in diameter. In this size range the gems have tables that are usually easier to polish and I have dopsticks that give a good amount of contact with the gemstone. There are other factors that can cause consternation, but for this post I will focus on keeping the stone on the dopstick and the stability of the tourmaline itself.
Here is one gemstone’s story and my personal trip to finally completing it.
I am dark and verdant like the jungles that cover much of Africa, where I was discovered by man. I had a good size of most of 2 grams and a good cross section and depth that came from being a stubby piece of crystal. The crystal was broken naturally, perpendicular to the principle axis and spent eons rolling around some ancient river getting smoothed and frosted. I appear to be flawless, but I have indications of my brittle nature on my surface. Instead of a continuous fracture cross my principle axis, I have a step like grove all around the core of the crystal. (The core is like the lead in a pencil.) This probably indicates some subtle change in chemistry that tourmaline is famous for. Changes in chemistry, whether it changes the color of the tourmaline or not can cause stress. Stress breaks crystals when they are ground.
My optical axis perpendicular to the principle axis are quite seductive, with a rich, but not dark, blue green punch, but it will be the darker green principle axis that will dominate my round. There is no other practical alternative. (Part of the fun of being a tourmaline is showing off your best sides, while he cuts and polishes you, and keeping your dark direction hidden in the dopping wax/epoxy.) I have seen this dark side before and the round will depend on its flash for most of its interest rather than body color. My mostly green face up color has elements of that when combined with flat highly polished facets will produce a nice personal gemstone. By personal gemstone, I mean one that needs to be moved around in decent light and at closer distances to be appreciated.
My first step in preforming a piece of rough is removing material, that obviously can not be incorporated into any finished gemstone. As I refine the shape of the rough, I will chose the plan of the table and grind it flat. With this piece of rough the preforming is quick and easy and I am soon grinding pavilion facets on the preform. It looks like I will get a good yield, when a crack forms parallel to the nascent table. It comes from the weakness that I thought the rough might have and it could ruin everything. But fortunately the crack is not too deep and by reducing the rounds diameter and grinding deeper, I can grind the damage out. It is essential that it all be removed or it may continue to crack later. Fortunately the reduction in size will not effect the beauty of this gemstone very much, because of its dark nature. But it could be the end of interest in a pale pastel.
The tourmaline polished well and it is time to transfer the gemstone so that I can cut and polish the crown/top. After using wax to hold the preform for cutting the pavilion, I use a two ingredient epoxy to hold the gemstone for working on the crown. It works well when it is fresh, but as it sits and ages, the time it needs to harden increases significantly. Recognizing this I had purchased “fresh” epoxy and was trying it out on this innocent gemstone. After limited preliminary grinding, the “fresh” epoxy failed completely and the gemstone came off the dopstick. With some effort and more “fresh” epoxy I was able to reattach the gemstone and grind a rather crude crown. I had let the “fresh” epoxy cure much longer and used an abundant amount. As I contemplated how much time and effort it would take to polish the crown into a reasonable set of facets that had good meets, I noticed that the gemstone had chipped at the girdle. This broke the camel’s backand I decided to recur the entire gemstone. While I had been working on this round, I had discovered that the “fresh” epoxy, even when it appeared to set up, did not hold the gemstone firm enough to polish.
A different batch of epoxy and a refreshed determination drove me to complete my rather modest personal gemstone. It flashes like tinsel on a Christmas tree and does have a vivid element so I am pleased with me work. Work that no one would guess ever happened, looking at the simple standard round brilliant sitting innocently in its plastic box. This gemstone’s story is complicated by the epoxy problems, but it is not alone when it comes to acting badly. I try to remember both the good and bad when I am asked “How long does it take to cut a tourmaline gemstone? I am ready with an answer that tries to keep it simple and also support the most complex and beautiful gemstones mother nature has ever produced, tourmaline.

